Welcome to Wolfoo - Official Channel
Enjoy watching this new episode :))
WOLFOO SEE GHOST AT PICNIC NIGHT
Thank you for your coming!
Please like, share and subscribe for more Wolfooooo!
-------------------------------------------
Jan Cartoon | Stanley's toy plane # 44 | Best Learning Videos for Kids - Duration: 2:59. For more infomation >> Jan Cartoon | Stanley's toy plane # 44 | Best Learning Videos for Kids - Duration: 2:59.
 -------------------------------------------
Swing Song | Junior Squad Cartoons | Videos For Children | Kindergarten Rhymes - Kids TV - Duration: 46:32.
Swing Song
-------------------------------------------
Caring Games : Care Games | Fun Girl Games | Baby Games For Kids | Free Games - Duration: 6:14.
Caring Games : Care Games | Fun Girl Games | Baby Games For Kids | Free Games
-------------------------------------------
EastEnders murderer makes shock RETURN to Walford for killer showdown? - Duration: 4:22.
EastEnders murderer makes shock RETURN to Walford for killer showdown?
EastEnders star Chrissie Watts (Tracy-Ann Oberman) could be one of the former characters making a return to the BBC show later this year.
The EastEnders cast member was last seen in Walford back in 2005 after she was arrested for murdering her husband Den Watts (Leslie Grantham), and it sounds like she could be heading back there once again.
Tracy-Ann confirmed she would be open to returning to the soap on Good Morning Britain today, which comes after soap producer Kate Oates confirming more secret returnees would be heading back to Albert Square.
Speaking about fans calling for her return, she told Kate Garraway and Charlotte Hawkins: "I think it's humbling.
Related Articles EastEnders for EXPLOSIVE 2019: Huge returns, relationship troubles and never-ending drama EastEnders murder victim REVEALED as shock death confirmed? EastEnders babe Jacqueline Jossa raises temperatures in racy sheer top.
"EastEnders is an incredible experience and to be part of this iconic show, and then also to have been part of murdering Dirty Den was very exciting.
So I'll take it as a compliment.
"She made an impact with people, that character.
It was beautifully written.
So I do think it's great to have had a character who made that much of an impact." She added: "You never say never.
When that phone call comes.
She's done [more time in prison] than most actual murderers!".
Could Chrissie make a shock return to get revenge on those who turned their back on her in Walford? Dirty Den's daughter Sharon Mitchell (Letitia Dean) certainly wouldn't be happy to see Chrissie after she pleaded guilty to murdering her father.
Chrissie and Den were married for six years after his divorce from Angie Watts, and after discovering he had cheated on her with Kate Mitchell (Jill Halfpenny), she threatened she would murder him.
Related Articles EastEnders to air heartbreaking death as character COLLAPSES? EastEnders' Bernadette Taylor looks unrecognisable in birthday snaps EastEnders fans SLAM Mel Owen in 'boring' storyline: 'Confront him already!'.
After confronting him with Sam Mitchell (Kim Metcalfe) and Zoe Slater (Michelle Ryan), Chrissie hit him over the head with an iron doorstep before attempting to frame Sam for the crime.
The iconic episode got more than 14 million viewers as Den was killed off for the second time.
EastEnders continues tomorrow at 7.30pm on BBC.
-------------------------------------------
Texturing bases for wargames - Duration: 10:14.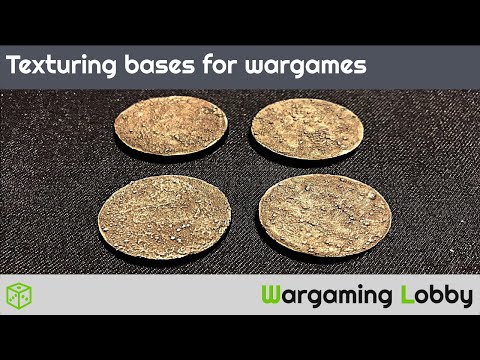
hey guys Wargaming Lobby here following up from the previous video I'm
gonna show you how to texture those bases that we made in the other video if
you haven't seen that I will put a link down in the description so here I have
one of the bases that I made on the previous tutorial ie actually base
coated that with some Vallejo primer in this case I use surface primer light
ghost gray which is one of my favorite primers I just did this because I
want to have like a grayish base but you can go black you can go white you can go
whatever you want so you get the bases and you prime them so this is
the first step after doing this you gather some materials that you may have
somebody uses kitty litter somebody uses baking soda well there are a lot of
different fine materials looking like sand but what I use if I can open
it is this this is lime lime that you can use in gardening it's magnesium
something I don't remember lime is a mix of variable size
particles you can see you have like bigger particles and smaller particles
so works pretty good as a ground texture you want to stick this on the base using
PVA glue or whatever glue want I use PVA because it's cheaper it's easier you grab
your PVA do with your brush and you stick it on the base like this it's easy
you don't need to take care of anything just don't go on too thick so it
takes less time for it to dry
again as I say not rocket science very easy
you cover the whole base with this glue and then the texturing itself is just
as simple as grabbing the cap of your Tupperware grabbing your
base and sprinkling on your lime or whatever you use kitty litter clay whatever
you have just a light tap and you have a lovely texture on top of your base we
are not done step in a little bit you're not done because this will fall
off as soon as the glue dries so we want to prevent that we get a little bit of
the PVA glue that you have you dilute it a little bit with some water to a pretty
runny consistency you can see here it's it's diluted I hope you can see and you
go on the other one don't don't need to wait for the bottom glue to dry you just
go on and dab it like this it's lightly and gently on top so that you
create a second layer of glue actually embedding all the texture in
the glue like this doesn't matter if the texture moves around actually because
it's random so you do whatever you want when you're done covering the whole base
you just have to wait for it to dry take some time because it's pretty runny but
you can do this in assembly line so you have it you put it on the side
here and wait and wait for it to dry of course I made four bases if you
remember so I already have one here where the glue is dry you can see the
lime is stuck on top of the base you can probably tear it down if you rub
strong enough but it's pretty sturdy so what you do now it's move on to the
color that you want as the base of your ground in my case I'm going to use this
bases for my orcs and I will show you I have my a flamer guy you can see bases
like this so I want like a brownish gray you can see it something like this so
we will be going after a slightly brown grey and to achieve that I will grab
some colors which are blue grey pale for my base gray and chocolate brown both
from Vallejo and I will just mix them lightly as you can see this there's not
like a huge difference we will be washing this in the next step so Brown
will be basically taking care of you know on the next level of course I already
have the step nailed down before so what I do now just get a small plastic bottle
cap some airbrush flow improver and some strong tone from Army
painter so we put one drop
of the wash with one drop of the flow improver oh I actually got two so I will
just add another one I want the mix one to one you want to be consistent
because this one will be the dominant color on your basis you don't want to
change along different basis so you mix the wash take care that it's properly
mixed of course and then you just go on top of the base there's nothing really
complicated you just go on top and take care to cover everything concentrate
around the the rocks we may say like the biggest particles so that it looks like
a bunch of rocks or you know crumble together yeah
here it is again wait to dry you can see how doing this as an assembly line
can save you a lot of time because when you're done with your last base the
first one will be dry BTW this is the dried one so the last step we have
to nail is of course dry brushing and I use as usually a creamy white I use this
titanium buff light I love this because it's creamy it's creamy so it's perfect
for dry brushing and it's not super chalky so it's it's subtle it's fine
I love it so using artists acrylics for dry brushing is really
economic and effective look for something like similar to this
around you you would be super happy with the result so what I do is just simply
dry brushing everything here I want to pick up the rocks actually but I also
want to go on the bare ground because this lime that I used it's not
necessarily a mix of big stuff you also have like a really really fine powder I
don't know if the camera catches that but there are really really fine
particles around the base this is the finished piece so this is another super
quick and super easy way to texture your bases you can put your broken stuff
grass moss rocks you can actually add some rocks like we did in the in the
previous video like grabbing some broken tiles add them adding them on top and
washing them together it's another option you can do whatever you want the
important thing that you need to do is just remember to paint black the rim of
the base black because it doesn't look really good like like it is now but
that's the only thing so here you have one single shot with all the four stages
that I painted in a sequence I hope you like it and next time we will
try to make a mold out of this kind of base silicone mold so that we can
replicate everything with resin stay tuned see you guys if you liked this
tutorial please like and subscribe so I can keep making more and don't forget to
leave your comments and critics in the comment section below so I can keep
improving thank you for watching
Không có nhận xét nào:
Đăng nhận xét