Aligning the print head
If printing is misaligned, try the print head alignment function.
Print head alignment improves printing misalignment.
Perform print head alignment in the following two steps. The operation flow is as follows.
1. Print the alignment sheet.
2. Scan the alignment sheet.
Let's start from Step 1.
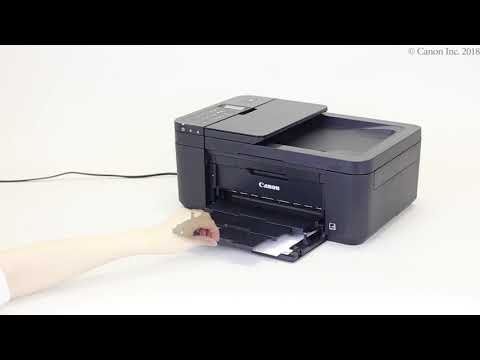
1 Load paper and open the output tray extension.
Important: Load a sheet of A4/Letter size plain paper in the cassette.
The paper settings confirmation screen appears. Follow the instructions to complete registration.
Open the operation panel.
Slide out the paper output tray and paper output support.
Open the output tray extension.
2 Print the print head alignment sheet.
Tap [Setup].
Tap [Maintenance].
Tap [Auto head alignment].
Tap [Yes].
The print head alignment sheet will be printed.
3 Check the print head alignment sheet.
Check for incomplete patterns, white horizontal streaks, or faint printing.
If X, perform print head cleaning, then print the print head alignment sheet again.
4 Place the print head alignment sheet.
Open the document cover.
Place the pattern on the platen with the printed side facing down.
Align the mark on the sheet with the reference mark on the printer.
Close the document cover gently so as not to move the print head alignment sheet.
5 Perform print head alignment.
Check the screen, then tap [OK].
Print head alignment starts automatically. Please wait a while.
Check the screen, then tap [OK].
The print head alignment (Auto) is now complete. Check that the printing misalignment is improved.
6 When an error message appears
Tap [OK] to clear the error, then check the following.
1. Check that the print head alignment sheet is printed properly.
Check for incomplete patterns, white horizontal streaks, or faint printing.
If X, perform print head cleaning, then print the print head alignment sheet again.
2. Check that the print head alignment sheet is placed correctly.


Không có nhận xét nào:
Đăng nhận xét