Thứ Ba, 3 tháng 10, 2017

Waching daily Oct 3 2017

In this video, I'm going to talk to you about

editing your videos for your business

once you have that raw footage recorded.

[music]

Hi. I'm Tricia Clements Chief Fur Wrangler with MuttButs.com.

I want to talk to you about your video.

Once you've got the raw footage

then what do you do?

A lot of times, you want to edit that

just a little snippet here and there

take a few things out add a little background audio

also maybe overlay a few things on it.

Some of the things you need to know about your video editing.

When you really start out

you don't want to go out

and buy a bunch of expensive software.

You want to find a free online app or software

open source, something that you can use

and you don't have to spend a lot of money using it

trying it out, seeing how you like it.

For those of you that are Mac users

the best one that I've heard of

I have not used it because I use a PC.

However, the IMovie, that is something

that has a lot of different features on it

and is the first place that you should start editing your videos.

Now, it's a little bit different for PC users

because there was something

that I recommended a lot for a lot of my clients called Movie Maker

Microsoft Movie Maker and that basically came with Microsoft

and you could use it for free.

The problem is early 2017, Microsoft stopped supporting it.

What that means is you can't go to Microsoft and download that.

So it typically doesn't come on your computer.

However, if you had Microsoft before

they stopped supporting it

you would be able to go on there

and get the software for that.

But now you can't, you have to go to

third parties and that's always iffy.

That's why you need to go out

and look for different open source applications and software.

There are several things that you can look for.

I have tried out numerous ones

and really there are a couple of things

you want to look for when you're looking

at your software or your app

that you're going to use to edit your videos.

The first thing is if you have not done much video editing

you really want to make sure it's easy to use.

There are a lot of things out there

that you can use that'll do the job

but they really take a lot of work learning.

For instance, if you are not familiar

and have not done a lot of video editing

I don't recommend Blender.

Blender is an app that I have used before

I really like it.

However, I haven't been using it as much

because there are other apps that are easier to use

Blender is really made for the video gaming, 3D, all kinds of things.

That has a lot of features in there

that I don't use for videos.

I've moved over to another app and that is called Shotcut.

There are lots of different things you can find

all kinds of alternatives to Movie Maker by Microsoft

but that's the one that I prefer.

Some other things when you look

at different software or apps

that you want to look at are different features that it has.

Is it easy to add maybe some background music in there.

Also, is it easy to clip and edit

and maybe have some different transitions.

What else is involved and how easy is that.

Another thing is your pictures.

A lot of times, I like to maybe overlay something

that I'm talking about on to the video.

You want to make sure that it has the ability to do that.

That is one thing that Microsoft Movie Maker

did not have the option

is to use transparent images.

When you put an image in

it basically clipped in the middle

and you would if you had audio

you could run the audio with that

but basically you could not have transparent images

on your video using Microsoft Movie Maker.

That was a big downfall for me

and why I would look and found another software to use.

Another big thing that you really want

to check when you're looking at

video editing software and apps

is to make sure that it doesn't have

a watermark for that company.

Because a lot of them they're like

"Well, try it out here" and you try it out

and you do some editing and you end up

and there's a big watermark

and then you have to pay to then get it to see if you like it.

Make sure you do not want someone else's watermark

on your video when you're done.

Make sure that anything that you decide

to edit your videos with does not have

that watermark on there for it.

Now you know everything that you need to find

a software or app to edit your videos.

I'm Tricia Clements, Chief Fur Wrangler with MuttButs.com.

Thanks for watching Please click the like button

share it with your friends and subscribe.

I'll see you in the next video.

For more infomation >> Editing Videos: What you need to know for your Business Videos - Duration: 5:30.

-------------------------------------------

easy and quick rangoli designs for diwali | diwali padwa special rangoli, muggulu designs simple - Duration: 1:00.

diwali padwa special rangoli

For more infomation >> easy and quick rangoli designs for diwali | diwali padwa special rangoli, muggulu designs simple - Duration: 1:00.

-------------------------------------------

Lights For The Cure: Avenue Of The Arts - Duration: 1:09.

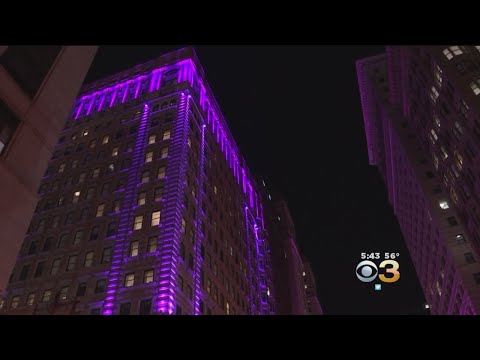
For more infomation >> Lights For The Cure: Avenue Of The Arts - Duration: 1:09.

-------------------------------------------

Forget Me Not Walk to Remember scheduled for Oct 21 - Duration: 2:06.

For more infomation >> Forget Me Not Walk to Remember scheduled for Oct 21 - Duration: 2:06.

-------------------------------------------

Community remembers Cpl. Middlebrook for his compassion beyond serving in the line of duty - Duration: 2:44.

For more infomation >> Community remembers Cpl. Middlebrook for his compassion beyond serving in the line of duty - Duration: 2:44.

-------------------------------------------

LIVE | League of Cancer | I had to kill myself for this video ( ͡° ͜ʖ ͡°) | - Duration: 47:09.

For more infomation >> LIVE | League of Cancer | I had to kill myself for this video ( ͡° ͜ʖ ͡°) | - Duration: 47:09.

-------------------------------------------

2 Works for You Tuesday Morning Weather Forecast - Duration: 2:31.

For more infomation >> 2 Works for You Tuesday Morning Weather Forecast - Duration: 2:31.

-------------------------------------------

How to Prep Nails for Acrylic or Gel Application - Salon Style - Duration: 8:34.

Hi everybody I'm Kristy Meakin from Naio Nails.

In this video I am going to show you like in real life when a client comes into you

with their nails.

We are going to start from scratch.

I am going to show you how I prep their nails.

Are you ready?

[background music]

So, here we have, I am not going to say her name. I don't want to embarrass her

But I love her very dearly

And this is how many, many come into the salon.

They come to you because they want their nails to look beautiful and clearly their nails

don't look beautiful or else they wouldn't be coming to you would they.

So, here we have some nails a little bit higglydy piggldy and a little bit messy, and then we've

got a little bit of cuticle damage going on.

Because this client likes to eat her skin

I thing that's called, erm, Canabalism

I am prone to it as well, myself.

Is it cannabalism when you eat your self?

Oh I don't know,

It's canabalism when you eat other humans

Self Harming

What I am going to do is clean these up a bit.

And I am going to clean up with some wipes, and then I've got some gel residue wipe

solution.

So, before I do anything I am going to wipe over the nails, because there is a grubbiness,

and I want to have them good and clean.

Now, what I am going to do is some cuticle work before I do anything.

I am going to push back the cuticles.

We are going to dry push them because if we use any solutions, like if we use cuticle

oil, then we are going to put cuticle oil into the nail and that will keep the nail

from staying on, the nail extensions that is not the real nail.

So, I am going to ease back those cuticles.

We can see some of the non-living tissue still stays attached to the nail.

But we will deal with that.

Do you say non living because it sounds less threatening than DEAD TISSUE

Because you should never take away the living tissue.

Yeah, but dead and no living are the same things right?

Maybe, I don't know. I just say it, I haven't got a clue

What would you do if a zombie came in?

I'd run really fast.

Obviously, I need to be a little bit careful here where she has had a bit of a nibble

we can use the other end of the cuticle pusher which will scrape off any non-living tissue.

Now, in salon what I would do is just give that a little scrape around and I would remove

most of that with a hand file or a cuticle bit on my e-file.

So, see the difference.

I can't really go on that with my hand file because that would hurt her and I don't

want to do that. because i love you so dearly

So, I we can do it quickly salon style, but we will have to take extra care with this finger.

So, you are going to take your file and you're going to go right into those folds here.

And as you file and prepping, you are only skipping across it, we are not being quite

abrasive.

We are just taking off that shine and we are removing that non-living tissue at the same

time.

Now I can we still have a little bit of acrylic still on this nail.

So, we are going to get rid of that.

Just softly buffing that off.

Because there is only a little smidge of it there.

While i am there

I am going to do the free edge.

That one is all prepared, same with the one.

See that non-living tissue.

Get rid of that, that is the first thing I want to do then I am going to pull the file

down the length of the nail.

There really isn't much of a free edge on that one, so I'm not going to really do anything to that

I am going to come back to this one.

Same with this one.

Get right into those grooves and then skip over the nail.

And tidy the free edge.

Same with this one.

Just get right into those folds, skip over the nail.

Tidy the free edge.

Now with this one what I can do I can do the free edge already.

It is not going to cause any harm.

What I will do I will use a cuticle bit which is usually a round one or I have this one

as well which is like a flattened off cone.

I think I am going to use the flattened off cone.

I think I will get a little bit close but I won't cause any pain.

I am going to put that on no higher than 10 and just going to move it around very gently.

Removing that non-living tissue away from that natural nail.

Because if we leave that non-living tissue on the nail, when we put the acrylic on it

will just pop off.

[e-file in background]

All done.

So, we don't need to go around that cuticle with our file now, all we need to do is skip

across that natural nail to take of the shine to make sure there is no acrylic left on there

from a set that she has had on there before.

And we are done.

I am going to dust over.

And then I going to wipe over with gel residue wipe off solution to clean that nail plate

And they are now ready for acrylic application.

I hope you have enjoyed this video.

I hope it has helped improve you to how you prep a nail.

It's really important.

I do get a lot of messages saying, "why does my nail fall off, and why I have done

this with a set of nails.

They are so fantastic but they fall off."

Most of it is down to your prep.

So, I hope that this helps you improve your prep.

In another video we will show you how I sculpt out a salon style and length nail.

Don't forget to check that out.

Also, don't for get to check us out on Facebook and Instagram and all of that.

And I will see you guys in the next video.

Bye, bye.

[music]

Không có nhận xét nào:

Đăng nhận xét