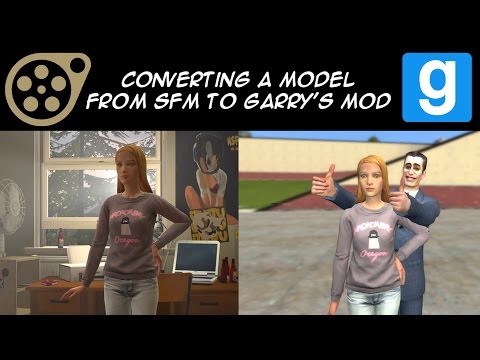
All right, so what I'm going to show you how to do is how to get these SFM models into
Garry's Mod.
And I made this short checklist that goes over the steps of how to do it.
I'm going to go over it in this video anyways.
So first, you'll need to find a model to download.
I downloaded this Chloe model because she a lot of bodygroups, she has facial flexes;
the only thing she'll really need is a collision model to get into Garry's Mod.
So once your model is downloaded and extracted just go into the Models and keep going until
you find the model file.
And then just bring open Crowbar and just drag it straight on top. and decompile it.
So once it's done you should have this QC file, the VTA which is her facial flexes,
and the rest of these are her bodygroups and her reference file.
So I'm just going to delete these, we don't need those.
So what you want to do first is open this QC file, the whole thing, inside Blender.
All right, so once you are inside Blender, you'll need to import the QC file; but first
I'm going to turn on screencast keys so you can see what I'm doing.
And let's just delete all this stuff and then import the QC file.
Go to wherever we decompiled it to.
Make sure this is set to "Make a new armature".
And import the QC.
So once this has been imported you'll notice it has all of her bodygroups.
It has all of her jackets, it has her hair, everything that has been included is now right
here.
We don't need all these dots - they are her VTA vertices, we can just delete those.
first what you want to do is see how many bones she has.
So select the bones and then go into Edit Mode and we'll see that she only has 95 bones
which is perfect because the limit is 128.
So we won't have to delete any or re-rig anything; It's going to be very easy.
What I'm going to do is import a standard citizen model to see just how large she is
compared to him.
Make sure its set to "Make a new armature" and import him.
And she is actually pretty tall compared to him.
So I guess I'm going to look up how tall she is and try to get her to a more natural scale;
I kind of assume these citizens are around 6 foot tall, maybe a little shorter; maybe
they're around 5 foot 10 or something like that - or 5' 9".
So with that, we'll see how tall she is.
So I went to her wiki page and I found that her height is 5 foot 9.
So we'll make her about that tall in the game.
So since she is 5 foot 9 we can use that compared to the citizen and scale her down.
So select all of her and this will be easier if you go into the um, this proportion mode,
by pressing 5.
And just start scaling her down.
And I think it would be right around there.
And then you would press Control A to apply the location, rotation, and scale.
We don't need him.
So after we have the correct scale what we can do is see if her bones, her hand bones,
match up work with the finger poser in Garry's Mod; and they don't.
So we will use that citizen skeleton, look at the name of his bones, and name them the
same thing.
So we'll take the left hand, and make sure that her left hand is also titled the Valvebiped
standard name.
And I'll grab the first part of the thumb and rename that as well.
And since we have those we don't really need the skeleton, we can just kind of work off
of this.
So the thumb is named finger0, the next part is named 01, and then the tip is named 02.
the first finger is named finger1, and then 11, and then 12.
Next finger.
The middle finger is finger2, the middle part of her middle finger is 21, and the end of
her finger is 22.
Her third finger, her ring finger, is finger3, next part is 31, and then 32.
And her last pinky finger is finger4, the first part is 41, and then this is 42.
You want to do this exact same thing of the other side but change all of the L''s to R's.
Make sure her right hand is a valvebiped right hand.
And we just need to copy the name of the fingers but make sure it is an R. So it's right
finger 0, and it's the same as the other side, this is 01, 02.
Make sure that is the Right hand, or the right finger.
And I'm going to copy that so I don't have to type it out a bunch.
Allright, so this is the right finger 11, right finger 12.
Just like the other side, finger 2, 21, 22.
Her ring finger is finger 3, this part is 31, the end part is 32.
And last, her right pinky is 4, this part is 41, and the end part is 42.
All right, so now she is scaled to a right size, her finger bones are named the correct
things.
If this was a - if this was not an SFM model we would need to rename all the materials
but we don't because it is already set up for source.
But if this was an MMD model or came from XNALara then you would probably need to rename
all of these to match whatever texture name you are using.
Oh, also, if you have a root bone at the bottom, delete it; we don't need it and it'll mess
up everything.
So now she is the correct scale, her fingers are named the correct thing, she should already
have faceposing, so the only thing she really needs now is you just need to export all of
these different things individually with this new skeleton with the new names and then create
a physics model and then it'll just be about done.
So to export all of these, go to this tab, scroll down, and set a directory.
I'll set it to the same spot, actually I'll create a new folder, right here titled "exported",
I guess.
And I will set that to the export path.
So I will start with.
let's start with this hair piece.
You want to select both the mesh and the skeleton, if you can, it might be kind of hard.
So I'm just going to hide some of these layers to make it a lot easier.
I'm going to grab her hair.
Shift, right click, and I still like to apply the location, rotation, and scale before I
export.
And make sure this is set to SMD and export her cap.
it just takes half a second.
And then uncheck the skeleton and we can delete the cap since its already exported.
Then we'll do her t-shirt.
That's done, we can delete it.
Do her hair, export it.
Uncheck the skeleton and delete her hair that we had.
Hair for jacket, I guess we'll do that too.
And you'll do this for every single piece that she has.
She even has a ring somewhere.
Make sure you get all of these small pieces like the rings.
We're going to export her face, her body, which is her reference; we're going to export
that last because we are going to use it to build the collision model.
keep doing this, I might even end up skipping some of this in the video so you're just not
watching me export a ton of things because it takes a little while when there's so many.
So down to the last bracelet.
Hide her.
And this should be the last thing before we export her body.
And you want to make sure there's not anything small that you missed.
You can just click on the skeleton and then Control I to invert it and it'll show you
everything that is left.
So it looks like we just have her body left. and the reason we moved this to a different
folder was because she has these shapekeys, these facial flexes, and you do not want to
overwrite these.
You want to make sure you are using the original ones because a lot of the times these can
get distorted in Blender when you import them.
And if you export them and use them they'll be distorted in the game, and all weird looking.
So just make sure that you don't use them or when it exports, you can just delete it.
So the last thing is her.
Apply location, rotation, scale, and export the reference.
this is going to take longer because she's also exporting those facial flexes.
All right, so now that everything is exported, let's just go to the folder to check it out.
So here is where we sent them to, was right here.
Like I said, delete her facial flexes that we exported, delete them.
And we'll go back and we'll take her QC and her facial flexes and we'll just move them
to this folder.
So she should have everything with the new skeleton, her original flexes, her original
QC file.
So what's left to do is make a collision model ad we'll do that now.
Now we're back in Blender and we're going to make a collision model, and it's not too
hard, just go over here to Create to start off, just make a cube.
And we are going to drag it up to her chest area and put on X-ray so you can see through
it.
So with the collision model, each chunk, each block that you make, you're going to be able
to grab with the physics gun as well as be able to move that part with the Ragdoll Mover.
You only want to really do the basic parts, you want to do each part of the spine, her
root hips, her upper and lower arms, her hand, her upper and lower legs, and her foot.
As well as her head, and her neck, and maybe her clavicle; we'll see.
So her upper, her Spine 2 starts from here and goes all the way to right here.
So we'll make this about that size.
So just go into Edit Mode and stretch it upwards, stretch it outwards, go to the side and make
sure it's around the right size.
And what you can do is go to these Mesh Tools and right here click Subdivide and it'll divide
that block up, and we'll do it one more time.
Then you can come up here, click Smooth vertex and it'll make it closer and closer to being
round the more times you click it.
So, it's a bit more natural shaped, I guess.
I'm just going to bring some of these over, just like that.
and now we have a piece that is roughly her upper body shape.
make it a bit taller.
all right, so we'll do the same thing for each part of her body.
We'll create a cube, and make it roughly the right size.
Subdivide and smooth vertex...
I'm going to make sure this is the right body part; and I'm going to turn the Names on so
I can make sure, just so I can make sure which piece I'm doing.
So this is for Spine 1.
Stretch it out a little bit.
And we're going to move that in because it looks weird.
All right, so what you can do is you can actually just make a duplicate of this and use it down
here as well.
Make sure it's still the right size.
You're kind of making like a suit of armor for her to wear, it like you're making a low-poly
version of her.
So you want it to be right about the same size as her.
All right, so we have the Spine2, Spine1, Spine, and then the hips which I believe is
the root bone... yeah it's the root bone.
So; I'm actually going to adjust this a bit.
All right, now I'm just going to do her legs.
So we'll duplicate that, bring it down, and rotate it.
And this goes all the way down to her knee, so we need to make that a lot longer.
And duplicate it.
And make her other leg.
And we can duplicate both of these at the same time and make them work as her lower
legs as well.
Make them a bit thinner.
make sure you're going into these side views to make they are not huge and actually match
her body size.
And I'm just making it really simple, but if you want you can go in and actually make
it a lot closer to her body size.
Like that.
But I'm going to keep it fairly simple.
All right, so next we have her feet, and we're just going to duplicate that again.
Smush them down.
Actually those look really weird, so I'm going to delete that one and make a new one.
All right, so, make sure that's about the right size, about the right shape.
and we'll duplicate that one and use it for her other foot too.
Allright.
So we still have her arms, neck, and head and clavicle.
So I'm just going to duplicate part of her legs, rotate it, and make it fit instead of
making a whole new cube every single time.
Make sure you're going in this above view so we can see how wide it is.
We're going to duplicate that, bring it over here, make it a little bit thinner.
Maybe a little bit longer too.
Shrink it down just a little bit just so it matches
the shape of her arm a little bit better.
It doesn't have to be exact.
For her hand I'm just going to duplicate her arm chunk and do it the same way.
That's about good.
What we can do for her arms is select them all, press S to scale, then make the X negative
1 and it'll flip it completely.
But let's duplicate it first so we can use it for over here, and then flip it so we don't
have to make a whole new arm.
And that's off.
It's right about there.
So for her clavicle, or her shoulder, I like to put them up here.
And her torso is in the way a little bit, so I'm going to take these and push them down
a little bit.
I'll do this side at the same time.
Then put this right about there, the bone is over here, but this is where we're just
going to put it.
I'll scale it down a little more.
All right, duplicate that, move it over.
We can move it forward a little bit more. and we're just going to use one of these to
make the neck and the head.
The neck goes from here to here, so we can do something like that.
Make sure it matches on all sides.
And that will be the neck chunk.
Duplicate it again and we can use this for her head.
Like I said it doesn't have to be exact, but make it a little bit closer to her head shape.
All right, that's close enough.
So we have each part.
So now what we're going to do is rig this collision model to her skeleton.
So let's just hide her for now.
And select it, and Shift Right Click to select the skeleton as well.
Control P, and set the parent to Object with Empty Groups.
That way it will make all these vertex groups, but they won't be set.
So let's go to the hips.
go to Edit Mode.
Make sure just the hips are selected.
Make sure all of it is selected; if you are not in wireframe mode, and select the front,
it will only select half of it.
So make sure you are selecting the entire thing.
So make sure the hips are selected and hit Assign.
And we'll go to the spine, we'll just work our way up.
Spine 1..
And Spine 2.
And what this is doing, if you go to pose mode, its making sure that those parts that
we just rigged are moving with the skeleton.
So since we haven't rigged the arm it's not moving with it.
So we are just going to continue doing that, rigging the entire thing, each part.
Spine 2 we already did.
Neck... pretty close to the head, make sure you're just getting the neck, not the shoulder.
All right, assign that; and I'm going to bring it down a tiny bit.
We can do the head.
Assign that.
Make sure these are the right names.
We have Head and GRPHead, so let's see, let's go to object mode, unhide her body; let's
see which one of these actually moves her head.
So GRPHead weirdly just moves her face, and Head moves her entire head so that's what
we want to rig it to.
All right; and we did that correctly, so that's good.
What's next, let's see.
The right shoulder is going to move this bone here, which is her clavicle or shoulder.
And that's actually the left one; make sure you're not mixing up the right and the left.
This goes by the models right arm and right shoulder, so assign it to the right shoulder,
even though it's on the left.
The right arm..
Right forearm..
And the hand.
All right and then we'll go to the other side, Her left.
So left shoulder, left arm, left forearm, and her hand.
Last we just have her legs to do.
And I'm going to make sure we're grabbing the right one.
So LeftUpLeg is the one that moves her leg, so I'm going to rig it to LeftUpLeg; or
RghtUpLeg, I guess. and then her knee, her lower leg, is actually just called Right Leg.
So select it, make sure all of its selected, and assign it.
Right Foot, make sure that one is assigned to her right foot.
And we'll do the same thing on the left side and she should be done.
left leg is assigned.
And the left foot.
So a good way to check is to grab her by the hips, her root bone, and bring her around,
and we'll see that there was one chunk on her hand that we missed.
Make sure that you are getting each and every part.
Oh that's actually not the collision model, that's actually her hand that isn't rigged
properly right there.
Well, we can still export this, just name it Physics, and export it to the same area.
It won't have textures, that's fine.
But what bothers me is that her hand isn't rigged.
It seems to be this bone right here; right finger 01.
Oh this doesn't even have it.
All right, that was my mistake earlier when I was renaming these, it
was probably fine
to begin with.
And since she wasn't rigged properly for a second there, we will have to re-export her
too.
So after we created the physics model we're going to go back into her folder where we
sent it and set up the QC to use that physics model.
So I'm going to open it up and you'll notice it has all the flexes, all the bodygroups
down here, some alternate skins, and we just have one sequence line.
But we also need this collision joint line, which I'm just going to grab from another
model and just paste it right in there.
But make sure it's the same name as yours.
Make sure the root bone is Hip because that's what it is.
So I'm going to save this and we're going to compile it and see if it works.
So just grab it and throw it right on the compiler and hit Compile QC File.
And kind of as I suspected earlier she has too many flexcontrollers.
I'm going to have to remove some of them.
Let's see.
So this says it's on line 162.
Let's see how many there are.
Right here is the issue, so we have about 4 we have to get rid of.
Let's get rid of, let's get rid of her nose wrinkler flex, and to do this, you just put
two slashes right before it; if you do that then the compiler will completely ignore that
entire line.
So we have that; I'm just trying to find the less necessary ones.
We might not need the cheek concave since we already have a cheek puff.
We can just use the reverse of that inside of Garry's Mod, it might not work, it might.
we removed four.
Let's save it and recompile and see if it works.
166; so we still need to get rid of one more.
Let's get rid of the nose flares, we don't need those.
All right, save it and recompile it again.
This is the part where you troubleshoot a lot.
Unknown flex controller flex cheek concave - oh that's right, if you get rid of them,
where'd it go, if you get rid of them up here, you also have to get rid of them down here.
So we removed cheek concave left and right, we removed i think just the nose flexes.
So I'm just going to mark those out.
Save it and recompile.
All right.
could not load file, oh, it's trying to load the animation file but we removed it.
So we're just going to remove that too.
Actually we'll just change it to - we still need this ragdoll line, but we'll change it
to the physics model.
So make sure you have that.
All right; save, recompile Again.
Allright and we're getting max flex verts, error exception violation - what this means,
it's just a generic error, it just means a lot of the times that you have too many
bodygroups on one model.
It's just trying to put too many things on one model.
So what we're going to do is go back to her bodygroups and we're just going to mark some
of them out.
Let's get rid of her wrist, let's get rid of her neck bodygroups, let's get rid of her
ring and let's see if that's enough to compile.
it might not be.
But this is all trial and error for right now so we're going to recompile and see if
it'll work.
Allright...
So removing those few things seemed to work; let's see what it looks like in the model
viewer when it's done compiling.
So when it's done just click View Model in Model Viewer.
It'll bring up the model and it'll show you what she looks like.
It's all right if it's all purple and black missing textures.
What we're doing now is making sure the physics model matches up, which it does, and the bones
match up, which they also do.
So the next thing to do would be to go into this Physics tab and set all of these jointconstrains.
So we're going to do that now.
So when you are in Half Life Model Viewer, go over to the
Physics tab to set all of her jointconstrains.
You'll want to select the left leg and you can hit this link here and test it using the
slider to see how far her joints will move.
And I already have them set because i had to redo this portion, something was wrong
with the recording, but you're going to try to make all of the parts seem kind of natural.
For example, this is her bottom leg.
You wouldn't want to make it bend in reverse because that's just a broken leg.
You can do it just a little bit, maybe about 5 just to be a little bit flexible; But try
to keep it pretty natural.
If your arms and legs can't bend that way then the model probably shouldn't.
And you're just going to set these; the X, the Y, and Z values for every single part.
You don't need to do the hips, and when I do this I don't set the shoulders, I keep
them at 0.
That way when you're inside Garry's Mod they don't flop around and you can still use the
Ragdoll Poser to move them.
So if you were posing the right arm you would start with the X value, whichever one.
But we can see that it can move about 60 degrees both directions.
The Y value I had set to move forward pretty far, and back not as far.
And for the Z value, which is up and down.
It can go up to about 100 degrees and down to about 140.
And you're going to want to have these the same on the other side.
So her right arm is 100 degrees and 140 degrees on the Z axis, you should do that on her left
arm as well so that they match up.
So her left arm can also go up 100 degrees and
down 140.
So that's basically about it for the jointconstrains.
When you're done, you're going to want to hit Generate QC right here and it's easiest
just to bring up notepad and hit Control V just to paste it.
And you're just going to be grabbing all of this and pasting it into our QC.
So it's going to rename your Physics that we had set to Ragdoll So we're just going
to copy the jointconstrains down to this.
And we don't need this ragdoll sequence.
And once you have this copied in here you're going to want to recompile it.
So when it's done compiling these should already be set, these should be saved to how you set
them.
So now we have a physics model, it's all rigged, jointconstrains are set, the last thing to
do would be to add any jigglebones, change - I like to change this to my folder so I
know where they all go.
So what I've noticed is that this model doesn't have any hair bones which is kind of weird,
so if you want to add any jigglebones I guess we would just add them to her breasts.
Left pectoral and right pectoral...
And i don't know the code right off my head, so I have different codes from different models.
Let's see...
This is the jigglebones for the hair, this is a much more simple jigglebone code, but
I'm going to copy this one for her breasts.
And rename it RightPectoral and make another one called LeftPectoral.
And I'll leave the code here for a second if you want to copy it.
So there's that, and now that it's saved, I'll recompile it and see how it looks.
All right, and here's the code to make her breasts about that bouncy.
I'll just leave it that way.
You should also be able to go in here and be able to see her different models of hair
and all of her different tops, even though the textures missing.
But we have it in game.
So the models complete, the very very last thing we have to do is take these bodygroups
and make them a separate model since they couldn't fit onto the original one.
So we're going to just name this Clothes.
I'll name it Chloe Accessories, and I'm going to get rid of all of this.
So the only thing that will be left will be the bodygroups that we did not have.
And because this is going to spawn as an effect and just be bonemerged on we don't need the
jointconstrains.
If you were making clothes as a separate model, I would say still have these jigglebones so
they match the model.
Make sure its saved as Clothes..
And let's see how it compiles.
Oops, we have to name it Clothes.qc, there we go.
And just drag it on here.
And it compiled very quickly, so we'll view the model in the model viewer.
There doesn't seem to be anything there, but there is.
She has neck, I think these are all just slightly different, yeah.
She has this wristband.
So I think now we're ready to go to the model file and put this in your Garry's Mod folder
wherever you said you would put it.
I'm just going to cut this whole folder and stick it right in there.
So now we have Chloe and her accessories, those couple bodygroups that couldn't fit.
And we're just going to take these materials, and these are already set to work with Garry's Mod
so we're just going to copy those and paste them right here.
Make sure they merge with the materials folder and that should be it.
So we're going to go into Garry's Mod to check it out and see if everything turned out correctly.
Allright, now that we are in Garry's Mod we will see if it worked, how well it turned out
So go down to Games, Garry's Mod, and find whichever folder you put it in; I put it in
Alan13 folder and then it was right here.
So right here we have the accessories, and right here we have the model.
What the heck happened to her?
Hmm...
Hmmmm, now that's really weird.
How about we go back... we go back and try and see why she came out so weird.
Ahh, so there's the problem.
So when we shrunk her down we didn't shrink her VTA vertices, Soo - Actually instead of
just going through all of that fixing all of them or transferring all of them from the
original to the new one, i just went to my recycle bin and i found the one that we deleted.
So I'm just going to use that and see if it works; This isn't the original, this is the
one that I deleted.
So this should have been here.
So let's see if that fixed it.
And that's Chloe Reference.vta so we're going to have to change that.
Make sure that is set to Chloe Reference, because that is the one that we exported,
not the original.
Now that it's done compiling let's see how it looks.
So it's not deformed, that's good.
A lot of these are working.
They're very subtle..
I guess that fixed it.
So i guess note to self: If you are going to rescale models, Don't use the original
vta files, actually export them and use that one to work.
So let's go to the model file, send that over.
Allright, and I guess we'll try and load up Garry's Mod.
Hopefully it works this time.
All right now that we are back in Garry's Mod, scroll back down to where we left the model
And she already looks a million times better than what she was.
And we also have these accessories.
Let's see what we have.
bodygroup tool.
We have different hairstyles, different bra - and there's a face flex that makes her boobs fit better
Oh, her skins change her shirt, that's cool.
So we have a bunch of different shirts, different bottoms, pants, jackets, shoes, all kinds of stuff
Her eyes are kind of dark.
I guess that's something that'll need tweaking later.
There they are.
Okay.
So let's check out some of her facial flexes.
All right, so these all seem to work pretty well.
Let's see if these - these should work.
These are the extra clothes that couldn't fit on the model.
And we'll put it on with the Easy Bonemerge Tool.
And it fit right on her.
So aside from her eyes looking kind of dark, I'd say she's pretty good.
All right, so I fixed her eyeballs; turns out that when you rescale models it completely
messes up their eyeposing So I'm going to show you how to fix them.
So on the left is the original QC file that we decompiled, this one on the right is the
one that we edited and the only numbers that we had to change are these three here, the
eyeball, and these three here for the other eyeball.
And I'm going to show you how to get these real quick.
So go into Blender and for her left eye select the very center, and you'll notice these three
values right here; the X, Y, and Z.
Which correspond to right here; The X, the Y, and the Z.
We can just take those from right here when you click on the very center of her eye.
Now the Y value is a little bit harder to get.
The easiest way is to select her whole eyeball and get just the edge of the outside.
We need to get the very middle of her eyeball.
When you have just this ring of the outside of her eye press E, then Enter, and then S
to scale it down, and you'll get that ring.
Hit Alt M, and just merge it at the center.
And you'll get this dot at the very center of her eye; and you can take that Y coordinate
and plug it in right here. and you'll do the same thing on the other eye.
And the only thing is the X value which is the negative.
And i think that's about it


 For more infomation >> Volvo V60 2.4 D6 AWD PLUG-IN HYBRID SUMMUM / 7% / PRIJS IS EXCL.BTW - Duration: 0:59.


 For more infomation >> Honda Accord 1.8I S AIRCO ELLEC.PAKKET TREKHAAK APK T/M 3-2-2018 - Duration: 0:56.
Không có nhận xét nào:
Đăng nhận xét