Top 10 Simulator Games|Best Simulator
Bus Simulator 2015
Disney Magic Kingdom
Dragons: Rise of Berk
Indian Train Simulator
Farmer Sim-2015
Monster Legends
MTB-Downhill
Farming Simulator
Simcity Buildlt
Vegas crime Simulator
-------------------------------------------
How 2 School Shoot with the Blorgus (For Kids!) - Duration: 0:44. For more infomation >> How 2 School Shoot with the Blorgus (For Kids!) - Duration: 0:44.
 -------------------------------------------
Here are the 9 RULES for being HUMAN passed down from Ancient Sa - Duration: 6:27.
Here
are the 9 RULES for being HUMAN passed down from Ancient Sanskrit
Sanskrit is regarded as the ancient language of Hinduism, used in different means in order
to communicate and dialogue with the ancient Hindu Celestial Gods.
This chart details the NINE rules for being a human, as passed down by Ancient Sanskrit.
According to Ancient.eu, the name or better said the term �Sanskrit� is derived from
two the conjoining of the prefix �Sam� meaning �samyak� which indicates �entirely�,
and �krit� that indicates �done�, which translated conveys a meaning of perfectly
or entirely done.
Sanskrit is a standardized dialect of Old Indo-Aryan, having originated in the 2nd millennium
BCE as Vedic Sanskrit and tracing its linguistic ancestry back to Proto-Indo-Iranian and Proto-Indo-European,
and was primarily used by ancient cultures inhabiting ancient and medieval South Asia.
For nearly 2000 years, Sanskrit was the language of a cultural order that exerted influence
across South Asia, Inner Asia, Southeast Asia, and to a certain extent East Asia.
It is one of the most important ancient languages thousands of years ago.
Sanskrit is today one of the 22 languages listed in the Eighth Schedule of the Constitution
of India, which mandates the Indian government to develop the language.
It continues to be widely used as a ceremonial language in Hindu religious rituals and Buddhist
practice in the form of hymns and chants.
Sanskrit is also an official language of the state of Uttarakhand� a state in the northern
part of India.
Interestingly, while doing what we all do best�surfing the web�I�ve come across
a curious chart which claims to describe the Rules for Being Human, as handed down from
the Ancient Sanskrit Language.
We can summarize the rules to 9 must-knows:
You will receive a body.
You will learn lessons.
There are no mistakes, only lessons.
A lesson is repeated until it is learned.
Learning lessons does not end.
�There� is no better than �Here�.
Others are merely mirrors of you.
What you make of your life is up to you.
The answers lie inside you.
Well, according to the chart which was allegedly composed of Ancient Sanskrit:
YOU WILL RECEIVE A BODY.
You may like it or hate it, but it will be yours for the entire period this time around.
YOU WILL LEARN LESSONS.
You are enrolled in a full-time, informal school called life.
Each day in this school you will have the opportunity to learn lessons.
You may like the lessons or think them irrelevant and stupid.
THERE ARE NO MISTAKES, ONLY LESSONS.
Growth is a process of trial and error, experimentation.
The �failed� experiments are as much a part of the process as the experiment that
ultimately �works�.
A LESSON IS REPEATED UNTIL IT IS LEARNED.
A lesson will be presented to you in various forms until you have learned it.
Then you can go on to the next lesson.
LEARNING LESSONS DOES NOT END.
There is no part of life that does not contain its lessons.
If you are alive, there are lessons to be learned.
�THERE� IS NO BETTER THAN �HERE�.
When your �there� has become a �here�, you will simply obtain another �there�
that again, looks better than �here�.
OTHERS ARE MERELY MIRRORS OF YOU.
You cannot love or hate something about another person unless it reflects to you something
you love or hate about yourself.
WHAT YOU MAKE OF YOUR LIFE IS UP TO YOU.
You have all the tools and resources you need; what you do with them is up to you.
The choice is yours.
THE ANSWERS LIE INSIDE YOU.
The answers to life�s questions lie inside you.
All you need to do is look, listen and trust.
Ok so, was this really passed down from ancient Sanskrit?
Well, the table�which originally appeared on illuzone.net is sourced back
to Dr. Ch�rie Carter-Scott MCC.
-------------------------------------------
When I Leave Prepared Lesson Plans for the Substitute Teacher - Duration: 0:43.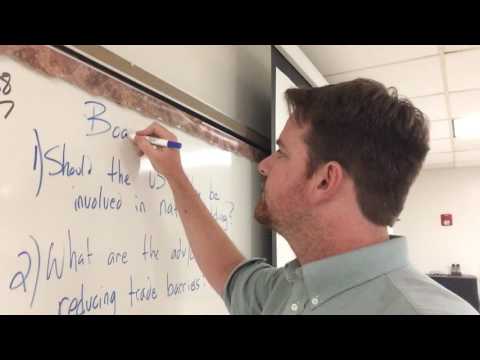
....and after you finish
with the chapter
assign the review.
I hope these lesson plans serve you well
thank you for watching my class.
Looks good.
Better put the work on the board for good measure.
Guess I'll just leave the lesson plans here... and wish him the best.
Lesson plans?
hahahahah. No.
No no no no.
We're watching Fifty Shades of Grey.
-------------------------------------------
THE ANNOUNCEMENT YOU WERE WAITING FOR! - Duration: 2:53.
Greetings Earthlings! welcome to the Madqueen
show! I am your host The MadQueen
And Mr Ruvver !
On today's menu we have something really really
special for you
and is not that we finished our real life building
Unfortunately, no
Is taking ages! But I have my computer and my
internet back which means that I'm able
to do videos again but this is not the
thing we need to announce you two things
that you were requesting and all finally here
First, at last!
We made the shirts of the channel
mean of my lovely face right?
we opened an online store where you can finally have
your very own Mr Ruvver mug for your
morning coffee
sorry had coffee
lots of coffee
I'm not going to give you coffee anymore
Why?!?
Or a shirt to remind your friends that you're
fucking hilarious
I like doing that
Or my favourite, the NetRuvver
that you're only going to find
funny if you're a cyberpunk nerd or have
an incredible hype for the upcoming
video game Cyberpunk 2077 I look so
I look so cute in there!
Yes you do!
And obviously as this channel is run by a lady and
a sock puppet that is sometimes a lady
everything has a fit for ladies version
so go and show some love to this lovely stripped face
You are going to find the store at
teespring.com/stores/madqueenshow
And it's too long to remember so I'm going to
leave a link in the description and not
only that we also launched a new server
at Discord to hang out in a more
direct way than on Twitter and to
discuss your favorite topics
Because there's life beyond dick jokes you know
I don't think there's much life
And obviously the link to the Discord server
is also in description so this week we're
going to continue with our usual
uploading schedule with little
interruptions since I need to finish our
building and decorating my office and I
need to finish soon because I'm going
crazy
Finish!
So we hope that you like the news and
we'd like to remind you that you are
amazing and we absolutely love your
support and to see how these little
small communitie is growing and how these
challenges us, because we are both
working in here to make better content every day
You are the best of the best
You. I love you
All of you
Well, thanks for watching
see your tomorrow with more Cyberpunk 2077
videos and stay BEING AMAZING
Send me messages
Now
Discord, info in description
-------------------------------------------
American Man Arrested for Fighting on a Plane - Duration: 1:00. For more infomation >> American Man Arrested for Fighting on a Plane - Duration: 1:00.
 -------------------------------------------
SWS 5050, Soils for Environmental Professionals - Duration: 0:59.
Hi, welcome to SWS 5050. This is
Soils for Environmental Professionals.
I'll be your main instructor this
semester. My name is Dr. Todd Osborne.
I'm faculty here in Soil and Water Sciences.
Now the course that we're going to do
this semester, 5050, is going to cover
a wide range of topics in soil science.
So we're going to talk about pedology,
which is understanding how soils form
and understanding how to taxonomically
identify them. We're also going to talk
about soil chemistry and to a great
degree, which will drive most of
our discussion throughout the semester
but we'll touch on soil physics as well,
especially how water moves through soils.
And we're going to wrap up the semester
looking at issues, broad issues such as
nutrient management and kind of global
issues in soil science. It'll be an exciting
semester. We'll cover a lot of material,
but we'll cover a broad range of things
such that you get a great overview of
soil science in general.
-------------------------------------------
Board Game Conversion Tutorial - Part 8 - Duration: 4:09.
In this final video, I'll add a version number and load screen to the main menu and build
the game for windows.
I'm going to put a version number text object onto the main screen.
I'll use the reuse script "Version Info" to fill out the text with the date, version number
and unity version.
Having a version number is useful once you start building an executable, to make sure
that you are actually using the latest build.
The "Version Info" script fills in the text with the date and number when the game is
run or built.
Next I'm going to fill in the load screen.
The MainMenu reuse script has code to fill the LoadCanvas with saved games.
Unfortunately, this script code relies on specifically named objects existing on the
LoadCanvas.
First create a Panel child object.
Set the alpha to 1.0.
Add another panel as a child of the first and name this one "title".
Set it to fill the top with a height of 64 and make it a darker grey.
Add a child TextMesh to the title.
Set the text to "Saved Games".
Add a child Button to the title.
Position it on the right side with a size of 50x50 and color it red.
Add a callback of MainMenu.OnLoadButton.
Set the child text to "X".
Now add a Scroll View as a child of the "Panel".
Set it to fill the area with a top border of 64.
Add a "Grid Layout" behavior to the Content object with a cell size of 400x272.
Now I'll create the "Saved Game Entry" prefab that the MainMenu script will create and populate
for each saved game.
Again, the names of the child elements need to match what the script code is expecting.
Create a Button object as a child of "Content" and name it "Saved Game Entry".
Move the child text element to the bottom left, set its height to 48 and name it "Date
Text" Add a child "Raw Image" object to the prefab.
Name it "Screen Capture" and set it to fill the area with a bottom of 48.
Add a child "Button" object to the prefab.
Move it to the bottom right, remove the button behavior and change the child text to say
"Load".
This button doesn't do anything since the whole tile is the button, but this makes it
clear to the players that they should click the tile to load a game.
Make the "Saved Game Entry" a prefab by dragging it to the "Prefab" directory.
Delete the "Saved Game Entry" on the load screen and hide the LoadCanvas.
Add the "Saved Game Entry" prefab to the MainMenu behavior on the Controller object.
Test the load screen by running the game, clicking the load button and loading the last
game.
A tile without a screenshot is caused when a game is started on the main menu and never
exited.
This will only happen during development or if the game crashes.
Next lets build an executable for Windows.
Bring up the "Build Setting" dialog from the File menu.
Add the open scenes and change the architecture to x86_64.
This will build a 64 bit executable and is required to use the Windows Voice plugin.
Pick a directory for the executable.
Double click the executable and then quickly press ALT to bring up the resolution dialog.
The executable runs and the game seems to work.
This wraps up my tutorial.
You can download a zip of my completed Unity project at the blog linked below.
-------------------------------------------
GNTC | Orientation | Selena Magnusson, Registrar - Duration: 0:17.
I'm Selena Magnusson, Registrar here at Georgia Northwestern Technical College.
I want to welcome you to the college and remind you to check the payment deadlines, withdraw
dates and registration periods on our web site each term.
-------------------------------------------
New App to Make Scheduling Easier for Veterans: Veteran Appointment Request (VAR) - Duration: 1:22.
[MUSIC]
Access to VA care doesn't begin or end in the waiting room.
But making and managing appointments to fit your
schedule can sometimes be tough.
There are the long lines or hold times, and too many details
to remember.
The Veteran Appointment Request app, or VAR, is here to make the
process easier for you from start to finish.
Whether you're scheduling a routine doctor's visit or
seeking mental health support for the first time,
VAR can get you there in a few easy steps.
With functions unique to your clinic, the VAR app
may help you:
Self-schedule an appointment with your PACT team,
request assistance from a VA scheduler for booking
an appointment online,
view upcoming appointments,
cancel appointments,
and more!
VAR is backed by the security of DS Logon.
Learn more about getting your DS Logon credentials
at mobile.va.gov/dslogon.
Available on your phone or computer, VAR is an easy tool
to help you take control of your health. Get started today.
Visit the "Veteran Appointment Request app" page in the
VA App Store to learn more.
[MUSIC]
-------------------------------------------
Board game conversion tutorial - Part 4 - Duration: 8:29.
In this video I'm going to layout the UI for the game itself.
I'll make player areas to show the player's chips and cards.
I'll create a player dialog to hold their place ribbon and turn marker.
Finally, I'll add the gift draw deck, current gift card and number of chips bid to the center
of the board.
Start by making the MainMenuCanvas inactive and the GameCanvas active so that our changes
will be visible.
Then add a background image that fills the canvas and has the felt sprite.
Start the player area by creating an image, sizing it to 600 by 200 and positioning it
in the bottom right.
Give it the border_0 sprite and color it red.
These will eventually be colored to match the player's color.
Set the "tag" of this object to Player.
The player area needs to show the number of chips the player has, the cards that they
have taken and their current score.
Create an image size 64x64 with the chip sprite.
Position the image on the left side of the area.
Add a TextMesh child object.
Center the text, color it black and size the font so that a large two digit number fits.
Make an area to hold the cards by creating an empty object.
Size it to 500x128 and position it in the upper right.
Give it a horizontal layout that controls the width and height of its children and expands
the height.
This area is going to hold all the player's cards and will use a negative spacing to compress
sequential cards together and a spacer to separate cards that aren't in a sequence.
Now I'll create a card.
Make an image and give it the card front sprite.
Its size is controlled by the horizontal layout so we need to add a layout element with a
preferred width of 96 to tell the Horizontal layout how wide the card should be.
Now add two TextMesh objects to the card to display the value of the card.
One should be centered in the middle of the card with a large outlined font.
To add the outline to the font, find the outline material that we created earlier and drag
it into the font face section of the TextMesh object.
The second text object should also contain the value of the card, but display it in a
small non-outlined font in the top left.
This text is positioned to be visible when sequential cards are compressed together.
Next I'll work on the spacing for sequential cards and a spacer object to separate sequences.
Duplicate the card a couple times and tweak the spacing of the horizontal layout so that
the cards are separated just enough to read the upper left text value.
Create an empty spacer object and add a layout element behavior.
Set the preferred width to 160.
Add another card to see the effect of the spacer object.
I'm going to show the player's score along the bottom of the player area as a formula
that will make it clear how the score is calculated.
Start with an empty object that fills the bottom and has a height of 64.
Add a TextMesh object with the text "Score" and orient it in the bottom left corner.
Add a second TextMesh object to display the total.
Set the text to "= -99", make it bold and position it in the bottom right.
Make a copy of the chip count text in the chip object.
Make the text white and move it down to the score line.
Do the same with the upperLeft text in the card object.
Set the text to -33, make it white and move it down to the score line.
That's it for the player area.
The script code is going to need to create cards and spacers as the player takes cards.
To accommodate that, make the card and the spacer a Prefab by dragging these objects
to the Prefab directory.
The player area itself will also be a prefab so that if we need to make changes to it later,
we can make the change to one copy and apply the change to the other six areas.
The players start without cards, so delete the card and spacer objects before making
the player area a prefab.
Also add the PlayerAreaGUI behavior.
Make a copy of the player area for each player.
Arrange these just like we did on the main menu.
Set the position member of the PlayerAreaGUI script the same way we did for the PlayerLoginArea
on the main menu.
Next I'll make the player dialogs.
In a more complex game, I use dialogs to get responses from the players or to display extra
information that I can't fit onto the main UI.
For this game, I'll put the player's place ribbon and the turn marker in the dialog.
The place ribbon is shown when the game is over, and the turn marker highlights the player
who needs to pay a chip or take the card.
Create an empty playerDialogs object in the DialogCanvas.
Size and position it to match the player area.
Add the PlayerDialogGUI behavior.
This re-use script requires a ribbon and a help dialog.
We aren't going to have a help dialog in this game, so just create an empty object for that.
Next add an image object, name it ribbon and set its size to 128x128.
Set the sprite to a ribbon sprite and position it above the player area.
Then add another image object, name it turnMarker, set its size to 128x128, set the sprite to
the gift icon and position it above the player area.
Drag the empty help object and the ribbon object into the PlayerDialogGUI behavior.
Make the playerDialogs object a prefab and move it down below the screen area.
The re-use script code will instantiate a playerDialogs prefab for each player and position
it over the player area on the DialogCanvas.
To do that, it needs to be able to find the DialogCanvas.
The code does that by looking for the "dialogCanvas" tag.
Add that tag to the DialogCanvas.
The game needs to display the gift deck, current card and current chips in the center of the
screen.
I'll start by making a container for these UI elements called center and sizing it to
200x200.
Then I'll add an image positioned in the upper right with a sprite of deck back and a size
of 96x128.
The deck should show how many cards are left, so I'll add a TextMesh object that fills the
image, is outlined and has a font size that will show "24" in parenthesis.
It is easy to forget how the deck is built when the computer does it for you, so I'll
also add some text below the deck that describes what cards make up the deck at the start of
the game.
To display the current card up for bid, I'll use the drawnCard prefab that I made for the
player area.
Add that prefab to the upper right and size it to 96x128.
Deactivate the score text.
Finally add a chip image and text at the bottom of the card to show how many chips have been
bid so far.
Rotate the whole center area to -90 so that it is not upside down for the players on the
top.
That concludes the Game UI.
In the next video I'll write code to model the game and draw the UI based on the model.
-------------------------------------------
Naturally Whiten Teeth With This Homemade Toothpowder - Duration: 7:12.
Naturally Whiten Teeth With This Homemade Toothpowder
-------------------------------------------
Waiting for the sun | Roblox apocalypse rising - Duration: 9:30.
Here is to much dark!!
Im telling them that im doing a video!!
Ok,let's wait the sun.
-------------------------------------------
Indian wedding dresses for women Flipkart amazon shopping online 785 - Duration: 0:53.
Indian wedding dresses for women Flipkart amazon shopping online
Không có nhận xét nào:
Đăng nhận xét